
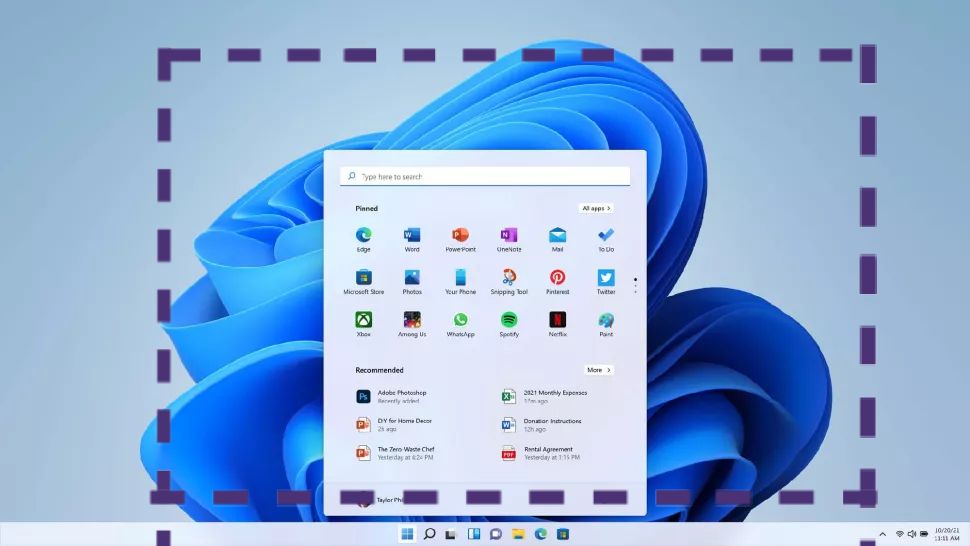
How to Take a Screenshot on Windows 11: 7 Easy Methods
Taking a screenshot on Windows 11 is one of the easiest ways to save what's currently displayed on your screen. Whether you want to capture an error message, save an online receipt, share a conversation, document a software problem, or save part of a webpage, Windows 11 provides several built-in screenshot methods.
You don't necessarily need to install a third-party screenshot application.
In this guide, we'll explain how to take a screenshot on Windows 11 using seven simple methods, including keyboard shortcuts and the built-in Snipping Tool.
What Is a Screenshot?
A screenshot is an image that captures what is displayed on your computer screen at a specific moment.
You can use screenshots to:
- Save important information
- Share instructions
- Report software problems
- Capture online content
- Save receipts or confirmations
- Create tutorials
- Document errors
- Share something with coworkers or friends
Windows 11 includes several tools that make taking screenshots quick and convenient.
1. Use Windows + Shift + S
One of the fastest ways to capture part of your screen is the Windows + Shift + S keyboard shortcut.
How It Works
Press:
Windows + Shift + S
Your screen will become slightly dimmed, and a screenshot toolbar will appear.
You can typically choose from different capture options, such as:
- Rectangular snip
- Freeform snip
- Window snip
- Full-screen snip
Select the area you want to capture.
The screenshot is then copied to your clipboard, allowing you to paste it into an application such as:
- Microsoft Word
- Paint
- Messaging apps
- Documents
- Image editors
This is one of the most useful screenshot shortcuts in Windows 11.
2. Use the Snipping Tool
Windows 11 includes a built-in application called Snipping Tool.
To open it:
1. Open the Start menu.
2. Search for Snipping Tool.
3. Open the application.
4. Select the screenshot option.
5. Choose the area you want to capture.
The Snipping Tool provides additional options beyond a basic keyboard shortcut.
Depending on the Windows version and available features, you can use it to capture screenshots and perform basic editing.
You can also save the screenshot as an image file.
Why Use Snipping Tool?
It's useful when you want more control over your screenshot.
You can capture:
- A specific section
- A particular window
- The entire screen
- A custom area
It's particularly helpful for creating tutorials and documenting technical problems.
3. Press the Print Screen Key
Many Windows keyboards include a key labeled:
PrtScn
or:
Print Screen
Pressing this key can capture the screen to the clipboard, depending on your Windows settings and keyboard configuration.
You can then open an application such as Paint and press:
Ctrl + V
to paste the screenshot.
From there, you can crop, edit, or save the image.
4. Use Windows + Print Screen
If you want to capture the entire screen and automatically save the image as a file, try:
Windows + PrtScn
Windows can save the screenshot automatically in the Screenshots folder within your Pictures folder.
A typical location is:
Pictures → Screenshots
This method is convenient when you don't want to paste the screenshot into another application first.
5. Capture Only the Active Window
Sometimes you don't want a screenshot of your entire desktop.
You may only want to capture the window you're currently working in.
Try:
Alt + PrtScn
This can capture the active window to the clipboard.
You can then open Paint, Word, or another compatible application and press:
Ctrl + V
This is especially useful when you have several windows open but only want to share one.
6. Use the Snipping Tool Through Windows Search
Another simple method is to open Snipping Tool directly from Windows Search.
Steps:
1. Press the Windows key.
2. Type Snipping Tool.
3. Open the application.
4. Select New or the screenshot option.
5. Select the area you want to capture.
6. Save the screenshot.
This method is useful if you don't remember keyboard shortcuts.
7. Use Xbox Game Bar for Screenshots
Windows 11 also includes Xbox Game Bar, which can be useful for capturing screenshots while using games or certain applications.
Press:
Windows + G
This opens the Game Bar interface.
You can use the capture controls to take a screenshot.
The captured image can typically be found in the associated Captures folder.
Xbox Game Bar is particularly useful for gamers who want to quickly capture gameplay without leaving the application.
Windows 11 Screenshot Shortcuts at a Glance
| Shortcut | Typical Use |
|---|---|
| Windows + Shift + S | Select an area to capture |
| Windows + PrtScn | Capture and save full screen |
| PrtScn | Capture screen to clipboard |
| Alt + PrtScn | Capture active window |
| Windows + G | Open Xbox Game Bar |
Keyboard behavior can vary depending on your device and keyboard configuration.
Where Are Screenshots Saved in Windows 11?
The location depends on the method you use.
Screenshots captured with certain Windows shortcuts may be automatically stored in:
Pictures → Screenshots
Screenshots captured using Xbox Game Bar are generally stored under:
Videos → Captures
Screenshots copied to the clipboard aren't automatically saved as image files until you paste and save them somewhere.
The Snipping Tool allows you to choose where to save a captured image.
How to Save a Screenshot as a JPG or PNG
After taking a screenshot with Snipping Tool:
1. Open the captured image.
2. Select the save option.
3. Choose a folder.
4. Enter a file name.
5. Select the desired image format if available.
6. Save the file.
PNG is often useful when you want to preserve image quality, while JPG can produce smaller files for some types of images.
How to Take a Screenshot of One Part of the Screen
The easiest method is usually:
Windows + Shift + S
Then select the rectangular or freeform capture option.
Drag your mouse over the area you want to capture.
This is useful when you only need a specific part of a webpage, document, application, or image.
How to Screenshot a Webpage on Windows 11
If you want to capture something visible on a webpage, you can use Windows' built-in screenshot tools.
For a visible section:
Windows + Shift + S
Then select the area you want.
Some browsers also provide their own screenshot or webpage capture features, which can be useful when you need to capture content beyond the currently visible portion of a webpage.
How to Take a Screenshot Without a Print Screen Key
Some modern keyboards and compact laptops may not have a dedicated Print Screen key.
In that case, you can use:
Windows + Shift + S
or search for:
Snipping Tool
This means you can take screenshots even without a dedicated PrtScn button.
Why Isn't My Screenshot Working?
If a screenshot shortcut doesn't appear to work, try these troubleshooting steps:
1. Try Snipping Tool
Search for Snipping Tool from the Start menu and test it directly.
2. Check Your Keyboard
Some laptops require the Fn key for certain keyboard functions.
3. Restart Windows
A simple restart can resolve temporary keyboard or application problems.
4. Check Windows Updates
Make sure Windows is updated.
5. Try Another Screenshot Method
If one shortcut doesn't work, use another method such as Snipping Tool.
How to Edit a Screenshot
After capturing an image, you may want to:
- Crop it
- Highlight something
- Add text
- Draw arrows
- Blur information
- Resize it
The Snipping Tool provides basic editing capabilities, while more advanced editing can be done using image-editing applications.
Before sharing a screenshot, check whether it contains private information such as:
- Passwords
- Email addresses
- Phone numbers
- Account numbers
- Payment information
- Private conversations
Always remove sensitive information before sharing screenshots publicly.
How to Take Screenshots for Work
Screenshots can be useful in many professional situations.
For example, you can use them to:
- Report a software bug
- Explain a technical issue
- Create documentation
- Show a website problem
- Share analytics
- Demonstrate a process
- Provide visual instructions
For professional communication, capturing only the relevant section can make the screenshot easier to understand.
Best Screenshot Method for Different Situations
Need a Quick Selection?
Use:
Windows + Shift + S
Need the Entire Screen Saved Automatically?
Use:
Windows + PrtScn
Need Only One Window?
Use:
Alt + PrtScn
Need Editing Options?
Use:
Snipping Tool
Need a Gaming Screenshot?
Use:
Xbox Game Bar
Choosing the right method can save time and reduce unnecessary editing.
Frequently Asked Questions
How do I take a screenshot on Windows 11?
You can press Windows + Shift + S to select an area, use Windows + PrtScn to capture the full screen, or open the Snipping Tool.
What is the shortcut for screenshots in Windows 11?
One of the most useful screenshot shortcuts is Windows + Shift + S.
Where do screenshots go on Windows 11?
Screenshots saved using certain Windows shortcuts are typically stored in Pictures → Screenshots. Other methods may copy the image to the clipboard or save it elsewhere.
How do I screenshot only one window?
Use Alt + PrtScn to capture the active window, or use the window capture option in Snipping Tool.
Can I take a screenshot without Print Screen?
Yes. You can use Windows + Shift + S or the Snipping Tool.
How do I screenshot part of the screen?
Press Windows + Shift + S, choose the appropriate capture mode, and select the area you want.
Can I edit screenshots in Windows 11?
Yes. The Snipping Tool provides basic editing capabilities, and you can also use other image-editing applications.
Why is my Windows 11 screenshot not saving?
If the screenshot is copied to the clipboard rather than automatically saved, paste it into an application such as Paint and save it manually. You can also use a screenshot method that automatically saves the image.
Final Thoughts
Learning how to take a screenshot on Windows 11 can save time when you're working, studying, troubleshooting, or communicating online.
For most users, Windows + Shift + S is the quickest option when you only need part of the screen. If you want an automatically saved full-screen image, Windows + PrtScn can be more convenient.
The built-in Snipping Tool is another excellent option when you want more control over the capture and basic editing.
Once you learn a few of these shortcuts, taking and sharing screenshots on Windows 11 becomes a quick and simple process.